I'm enamored of those “For Dummies” books, especially the one for Photoshop. The “Complete Idiot's Guide to...” books are great too, clear, concise, thorough, and with a hefty helping of humor. Since those two titles are taken, copyrighted, and surrounded by a battalion of lawyers, I herewith offer...
The Complete Landlubber's Guide to Watercolor
(it's easy, really!)
The Basics:
- Inexpensive, simple, requires a minimum of equipment.
- Portable: a kit with colors, a mixing palette in the lid, a couple brushes (cheap nylon or taklon works), heavy (100 or more) paper on a drawing board (cookie sheet, masonite), water, pencil, eraser, foldy chair, go anywhere.
- You can also use a pan set, (box with little dry pans of color) though that limits your ability to mix colors. You can create your own pan with a palette and tube paints squeezed into it and allowed to dry.
- You can mix a world of color from just a few colors.
- It works like the crayons you played with as a kid (or are doing adult coloring books now with)... draw, color.
- Crayons and watercolor are translucent, (house paint and craft paint are opaque... artists' oils and acrylics are in between, you can paint light over dark with them).
- As with your crayons, you CANNOT paint light over dark with watercolor.
- The paper is your light. The paper is your white paint.
- Work light to dark. You can add color to an area that's too light, but painting over a dark area will lift and smudge it.
- You can LIFT color by making it wet and dabbing with a towel or rub it up with a wet brush or scratch (heavy paper only) with an xacto knife.
- Add water to make a color lighter.
- it's WATER...COLOR... there is a lot of water involved. Squeeze out a tiny pencil eraser blob of COLOR ... mix it with WATER to get something that looks more like Gatorade than toothpaste. You'll be able to see your pencil lines through it.
- You can erase your lines, or make them darker with pencil, Prismacolor Pencil, or marker or ink. This is a technique often used in kids' books, cartooning and comic books.
- You can also work very photorealistic with practice. Watercolor is versatile.
- Try salt (it makes the color go all snowflakey), spatter (toothbrush!) and sponges. Add crayons (they resist the watercolor), color pencils or markers.
- Real artists study the real world, then interpret it. Use reference, understand the thing you are drawing/painting.
- Anything you put on paper is practice, a science experiment. Practice makes you better. "There are no mistakes, only happy accidents." (Bob Ross).
|
Stuff you need:
The really short list of beginner's tools:
More stuff you'll need when you find out how cool this is:
Watercolors: Not those pan sets with the chipmunk toothbrush included. Real watercolors. In tubes. Winsor Newton makes some great student grade colors stupid cheap: Cotman. You only need 8 colors (you can get more later, if you insist). In a perfect world you'd only need three colors, you know which ones, the primaries on the color wheel; red, yellow and blue. Sadly, they don't actually exist (in the World of Paint). What does exist is: Ultramarine Blue: on the reddish side of the color wheel (or purplish), mixed with alizarin crimson, you actually get purple, not Monkey Vomit Violet. Prussian Blue: Or winsor blue. On the yellowish side of the color wheel (or greenish). Mixed with yellows, you get great greens. Also, oddly, if you mix it with burnt umber or burnt sienna, you get subtle greens. Lemon Yellow: on the blueish (or greenish) side of the color wheel. Makes yummy greens, lousy oranges. Looks like a not quite ripe banana...or...um... a lemon. Cadmium Yellow: on the reddish (orangeish) side of the color wheel.Looks like a not quite ripe orange. Or a banana you better eat now. Cadmium Red, or Scarlet, or Vermillion; on the yellowish (orangeish) side of the color wheel. This is the color insurance companies charge extra for, if it's on your sports car. Also think warning signs and those red/orange hunter hats. Alizarin Crimson; which I always remember as “ a lizard in crimson”. On the blueish (purpley) side of the color wheel. Makes awesome purples, rich burgundies. Blood bay horses have a heavy dose of this color in their coats. Burnt Umber; dark chocolate. Lives in the middle of the color wheel, somewhat blueish/cool brown. Makes great blacks and greys when mixed with Ultramarine Blue. Burnt Sienna: chestnut, the color of red hair, Irish Setters, chestnut horses. Lives in the center of the color wheel. Rather hot/orangey brown. Makes great chestnut horses, redheads, and odd greens if mixed with Prussian Blue. |
 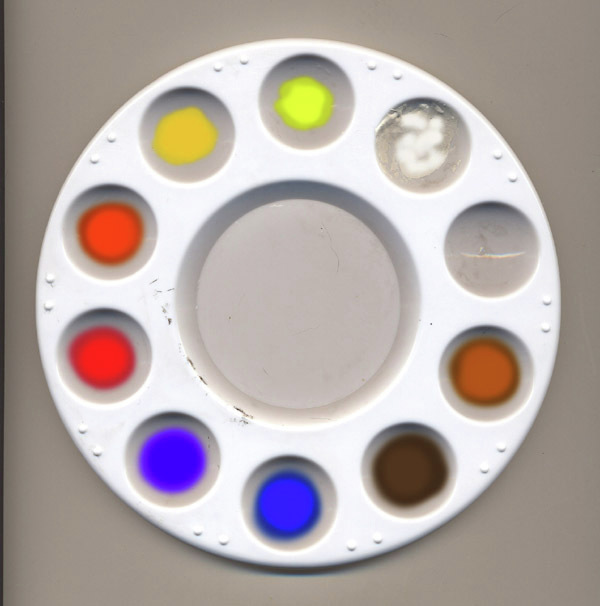 From empty space at 2:00: burnt sienna, burnt umber, prussian blue, ultramarine blue, alizarin crimson, vermillion, cad yellow, lemon yellow, opaque white 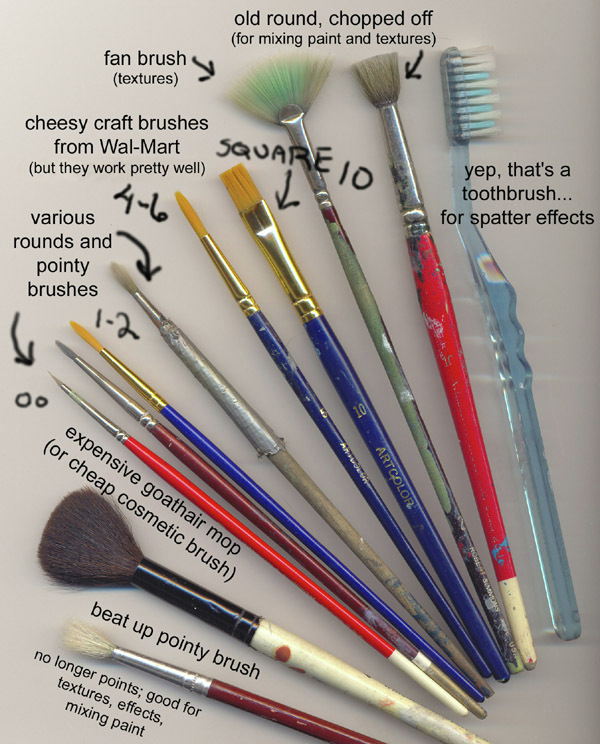 |
A smaller amount of good paint, or brushes, is better than lots of bad stuff. Burnt Sienna and Ultramarine Blue make a wide variety of greys, chestnuts, chocolates, browns, blues and blacks. You can also do a lot with those plus Lemon Yellow. Paper is critical: no thin wimpy stuff (except for testing your colors and doodling). Use at least 100lb. Strathmore Vellum Bristol (nice eggshell finish, can draw, get detail and watercolor easily). 140 pound paper is even better: you can scratch, scrub wet and wet again without damage.
some useful brushes
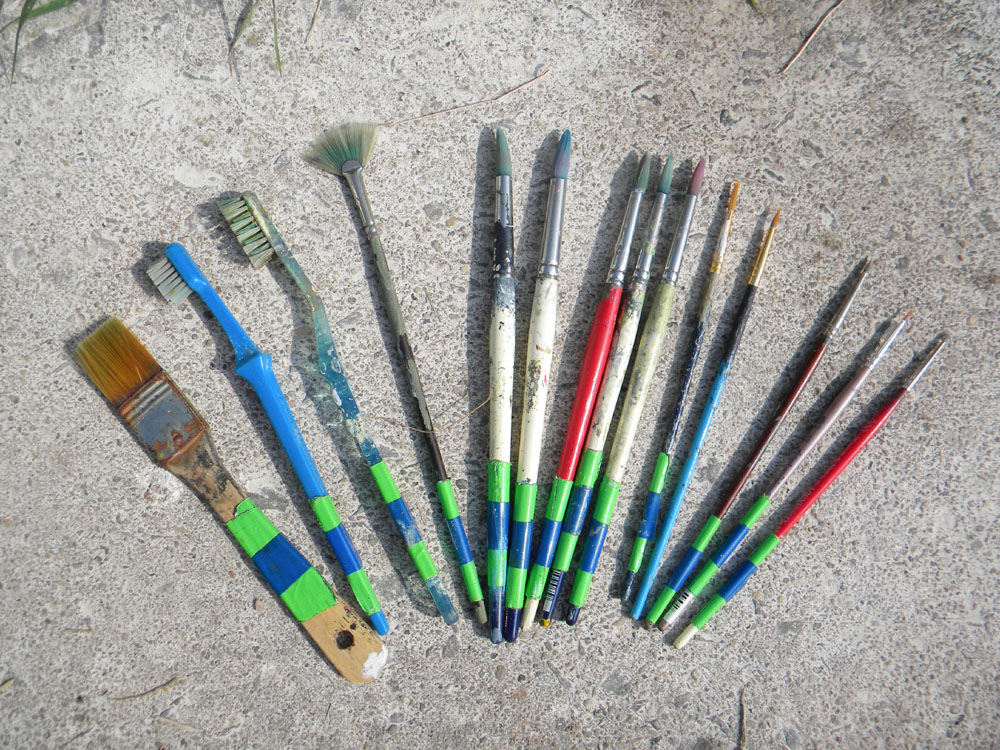
much used good brushes: I prefer pointy but I have one square wash brush, toothbrushes for spatter, fan brush, and a lot of springy/pointy nylon/taklon (keeps point for years)
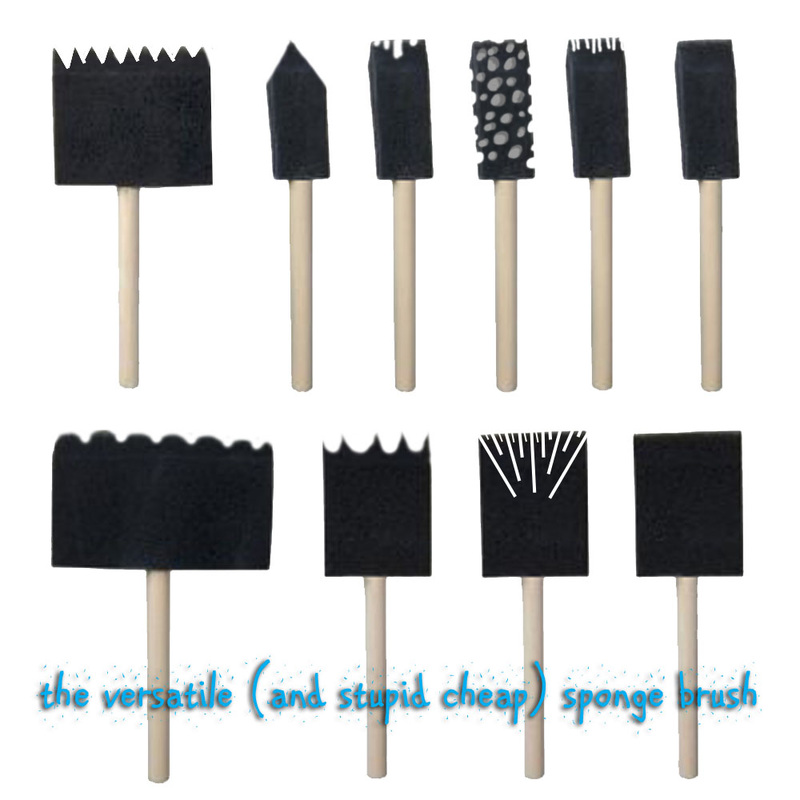
the ever versatile and stupid cheap sponge brush, you can cut them into various useful shapes
|
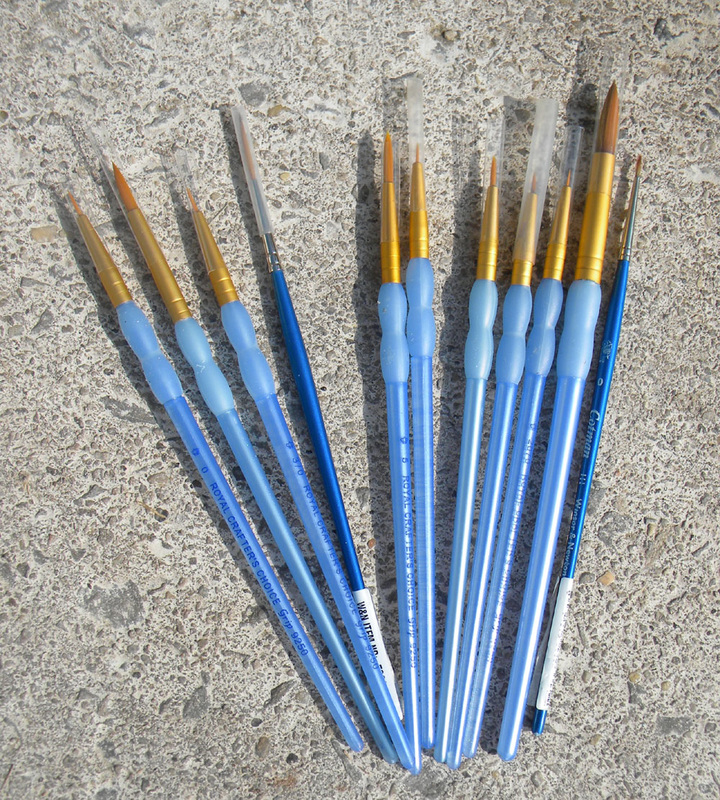
nice collection of springy/pointy taklon/nylon with protective sleeves, I prefer pointy brushes, not square ones.
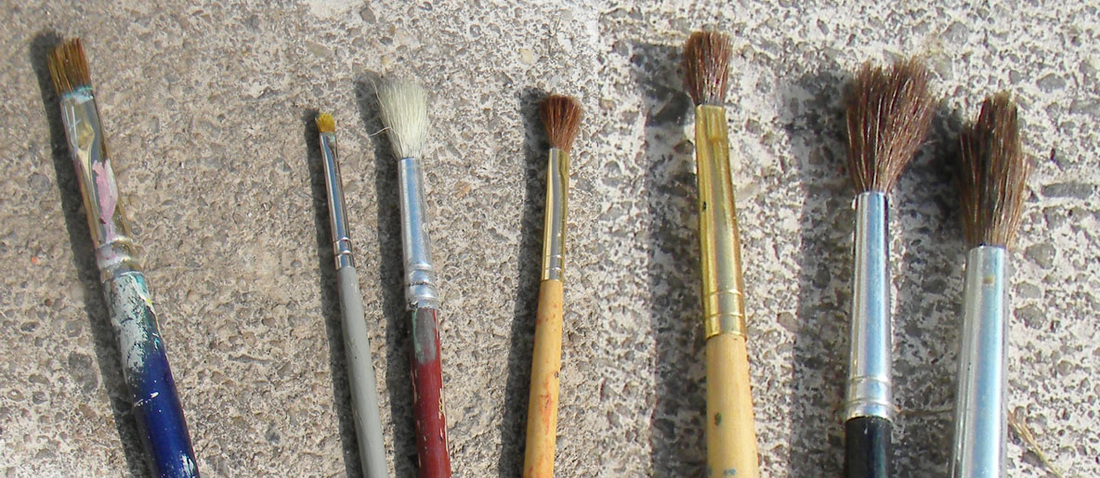
Just say NO! to nasty horrible floppy limp cheap hair brushes. They have no spring, no point, you can't do detail, you have no control. Suitable for slopping Modpodge onto rocks. Or not, because, limp, floppy, and the hairs fall out,
|
Of course, there are super expensive natural hair brushes in the fine arts aisle at your local craft/art store. Those rule. And they last a long time. But few of us can afford them. I've found the various synthetics to be fine and hold up well. Nylon or taklon brushes are the best bang for the buck.
There is no White Paint! The white paper is your white. You make lighter colors by mixing in more water, darker colors with more paint and less water. You leave the lights (you can't paint light over dark) and paint in the shadows. Ok, I lied, there's white paint on the palette at right; I sometimes use white paint, sparingly, to bring back highlights that got lost. NEVER mix white paint with watercolor (it turns it into a chalky, dead mess); if you blew it, and lost your lights, use acrylics, Prismacolor pencils, or other opaque mediums to put light colors over dark .
There is no Black Paint! Black is made of charcoal, nuclearized roadkill, and other dead stuff. Mix live, multi-hued blacks out of Burnt umber and Ultramarine Blue, or experiment with other opposites on the color wheel.
Blue and Brown: Ultramarine blue and burnt sienna can be a great place to start if you don't want to invest in an entire set of watercolors. They are basically opposites on the color wheel, mix to create various shades of browns and blues and greys and blacks. Most animals can be painted with these colors (most mammals, and what birders refer to as "little brown jobs" are some shade of brown that can be created with sienna and blue). You can do a limited color land or seascape as well, concentrating on how you sling the watercolor, not "OMG what am I mixing now and how did I get calf scours green again?!?!?"
White Paper: Watercolor can be done on many kinds of paper; experiment. The basic rules are: heavier is better. I like a smooth Vellum Bristol (sort of an eggshell finish) because I do a lot of illustration, in small, scannable sizes, with details. You may want to use cold press or rough papers (especially on landscapes) for their nifty textures. Hot press is very very smooth, your brush will act like an ice skater.
Drawing Board, tape, staples, bathtub. The simplest way to keep your wet paper from wrinkling is to tape it to a drawing board. Masonite works well; you can buy a huge 4' x 8' sheet at the hardware store and have them cut it into various smaller sizes (or you can pay four times as much for one tiny little one at an art supply store). Tape the ENTIRE edge, any loose paper will wrinkle like your grandma's forehead when you told her you were going to ski the death slope. For really big projects: use plywood, throw your watercolor paper in the bathtub, soak it overnight, slap it on the plywood, and staple it down (staple gun staples!). Let it dry, and it will stretch as tight as a drum. It will never wrinkle.
Pencils, erasers, scribble paper, sketchbook: You can, of course, simply throw paint onto the paper while eyeing up a lovely sunset. I prefer drawing first. I may also sketch some thumbnails or roughs (but not usually, I hate doing a piece five times). Roughs can help you work out design issues. A sketchbook is easy to carry with you and practice practice practice drawing trees, animals, superheroes, dragons or whatever. When you go to paint it will be much easier. You can use your sketchbook as reference too.
Brushes: they don't have to be expensive, but they do have to be good. There's nothing worse than painting with a soggy soft brush with no point, or one of those chipmunk toothbrushes they include in those horrible pan sets. Again, I'm a Winsor-Newton fan, but other companies make good stuff too. Many cheapo brushes from craft stores work great: if they are made of nylon or taklon they keep their shape, the paint flows out nicely, and they last. I'm working 8 x 10 usually (so I can scan it), and I use a bunch of springy, pointy brushes: 000, 0, 1, 4, 8, 10. Experiment with square, bristley, toothbrushes (spatter), sponges, crumpled paper towels, rags, house painting brushes (those spongey ones are good for washes), twigs (makes a nice line). The “fake sable” kind work great for me (springy, pointy). Don't ever stand them on their heads in water, or let them lie on the table with acrylic or craft paint on them (which will dry to the consistency of fossilized dinosaur poop).
Palettes: My favorites are the little salad dish sized round plastic palettes (white!): around the rim are round depressions for squeezing paint into, the center is a large “hole” for mixing. There are all sizes, shapes and configurations. You really really need it to be WHITE! So you can see the color you are mixing. My watercolor kit comes with a lid that is a palette. Egg cartons will do in a pinch, as will various plastic lids, tubs and other kitchen castoffs.
Bucket and Kitchen Sink; art supply stores sell a variety of water containers with springs or racks to hold your brushes with their heads in the water, but not standing on their heads (it bends them into useless, bad hair day shapes; they look like an alpaca who encountered an electric fence). You'll need several water containers: one for rinsing brushes, one for clean water to mix with your next puddle of paint. I use an old hair dye bottle to drip clean water into my paint to thin it. A large brush, or sponge also works.
Rags; cotton is wonderful (I just learned alpaca hair is absorbent too). You'll need some sort of rags or towels to dab your brush (adjusting the amount of wet in it), blot your painting, or wipe up the mess the ferret just made...(famous "Yes" album cover artist Roger Dean once told a tale of having to paint out cat tracks across a sky in one of his pieces).
Hair Dryer: it's my best friend. Apply watercolor in layers, glazes. Dry in between. You can speed things up amazingly with a dryer set on nuclear blast. Outdoors, you're on your own... you may want to have a couple of pieces going at once; work on one while the other dries. Note: acrylics (which can be used like watercolor or thick like oils) will dry impervious to water, cats, kids and global warming. You can paint in layers without picking up paint on the layer below. Watercolor; not so much. You can pick up dried watercolor with a wet brush, rag, or spatter or spritz it, then dab. You can also scratch it off heavier paper (like 140 lb.). This can be good for some neat effects.
REFERENCE REFERENCE REFERENCE!!! Don't draw out of your head. Draw from life, from your dog, your cat, your ferret, your kid, your neighbor, your buddy, the guy on the bus, the kids at the game. The taxidermy in the museum, the fish in the aquarium, the critters at the zoo. Go Plein Aire and paint the landscape in front of you, the historic house, the Revolutionary War tall ship that educates kids each summer. If the weather reeketh, drag out those magazines. Drop in a DVD, freeze frame it. Look stuff up online (you can find pics of anything). It's best to work from 3D/life, but photo reference helps too. Oh yeah, and you can use a mirror too! You can learn by copying other people's art (just don't try to sell your copy!) but for reference, get as close to reality as possible. Copying someone's art you copy their mistakes.
Start by understanding the real world. (the guys at Pixar, Disney and other great artists do). The Disney guys understood real lions before they crowned the Lion King. The Pixar guys went diving before they found Nemo and Dory, and must have looked at a horde of dogs before they went UP. And the guys who did How To Train Your Dragon... I don't know where they found the dragons to study...
...seriously; they studied the anatomy and movements of animals like salamanders, lizards, snakes, cats, dogs, horses, birds etc. Then they interpreted what they'd seen and created something unique. Watching both HTTYD films, I felt like the dragons , their expressions and movements were familiar. I've crouched over the neck of a jumping horse, like Hiccup does on Toothless, flying. I've flown in sailplanes (with a real pilot), "flown" underwater scuba diving, banked around a turn on a dogsled gripping the driving bow (like Hiccup and Toothless banking in flight), and been on a tall ship heeling hard under a good wind. Clearly the animators of HTTYD understood real world animals, physics, and the sheer FEEL of adventure, and translated it into a fantastic, gorgeous thrill ride of a movie... that also contains good storytelling and memorable characters.
  Do try Mixed Media: you can experiment with other media with watercolor; crayons, Prismacolor Pencil (there are no other colored pencils, really), acrylics, craft paints, even house paint. Craft and house paints are opaque (it's meant to cover that awful shade of 1950s swimming pool green the last resident painted the bathroom). Acrylics, like watercolors, are translucent (like stained glass). Crayons resist watercolor (a white crayon scribbled on paper will show through when you paint blue over it, also works for any other color combo). Prismacolors can define edges, create detail and texture, and create a wonderful illustrative style. Acrylics and other paints can be painted over watercolor to add highlights you've lost, add detail (when you need opaque paint, to paint over something). Try painting on colored paper (MiTientes or other charcoal papers) or mat board; you'll need colored pencils or opaque paint (gouache, acrylics, even craft paints) for highlights. Your brush is not a pencil. And don't scrub! Brushes hate it. Stroke your brush: it should follow the handle like a dog's tail follows the dog. A dog's tail does not go backwards. It might go sideways... Scrubbing also tears up your paper. Using too much eraser does too. (Use a kneaded rubber eraser.) And when drawing, draw lightly. If you do have heavy paper, you can use a bristle brush to scrub color off. Paint what you actually see: not what you think you see. Not the picture in your head, in your third grade memory. Water is not blue. Apples are not red. Grass is not green. Horses are not brown. LOOK carefully at what you are painting, and see the real colors. Water will reflect the light and colors of sky and surroundings (a silver sky and a hazy day threatening rain makes the river silver... about 42 shades of silver and iron and pewter and steel). Apples come in reds, greens and yellows; and each apple is a dance of colors, streaks, dapples and spots. A brown horse might be light chestnut or liver chestnut, or blood bay or dark bay, or sun-bleached black, or sorrel or Appaloosa or Sabino... And don't even ask me what color George Washington's white horse was! (It was probably grey, but might have been perlino or cremello, a double dilute, champagne, an extreme (no color spots) pinto, or few-spot Appaloosa, or actually white. Not albino though, horses do not come in albino.) Don't try to be Leonardo: anyway, he went down with the Titanic. Have fun, learn, stay loose. Keep practicing. Talent is highly overrated; if you put in the hours, you will be excellent. 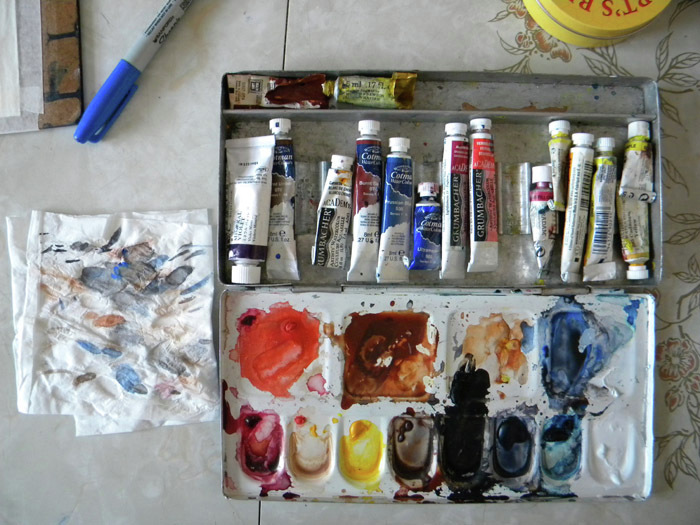 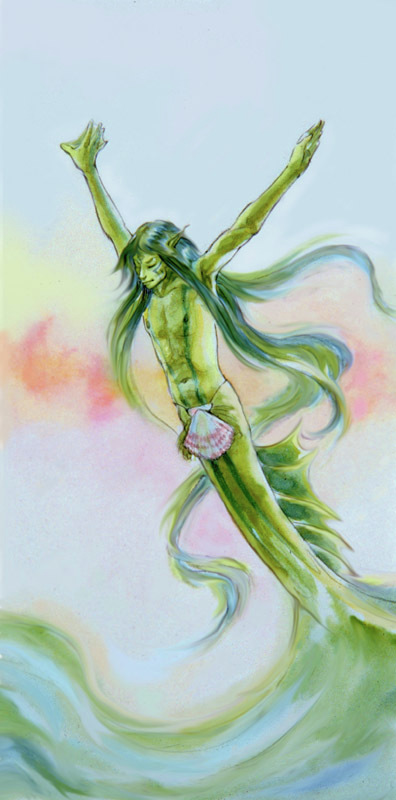 |
Stuff to Know:
It's WATER color! It should not look like house paint. It should not look like oil paint. It should not look like those little craft paints you squeeze out to paint the teddy bear's bench with. No peanut butter. No applesauce. No toothpaste. Especially not creamed carrots. It should look like grape juice. Blue Gatorade. Orange juice. Cola. It should flow off your brush like ink. You can make an ocean out of a dot of blue. Make enough of a puddle of color to do the whole sky; if you run out in the midst of your paper, you'll never ever match that color again. Know the Color Wheel: have a good mental image of the color wheel and where all your paints fit on it. That will allow you to mix colors and have some clue as to what you might get (oh nooooooo, not monkey vomit violet again!). Take notes, put dabs of the colors you've mixed on your own color wheel. Never mix White Paint with other colors! Easy, because you don't have White Paint. Oh, wait, you might have a tube of Chinese white, or gouache (very opaque white) to fix goobers, or put light back into the parts you put too much paint over. If you mix white with colors, you get a pasty chalky mess. Never mix Black Paint with other Colors! Easy, because there is no Black Paint. If you did mix black, you would deaden the colors. Instead, mix the opposite color to darken it, mix a brown, or Ultramarine and Burnt Umber, or other dark, rich colors. 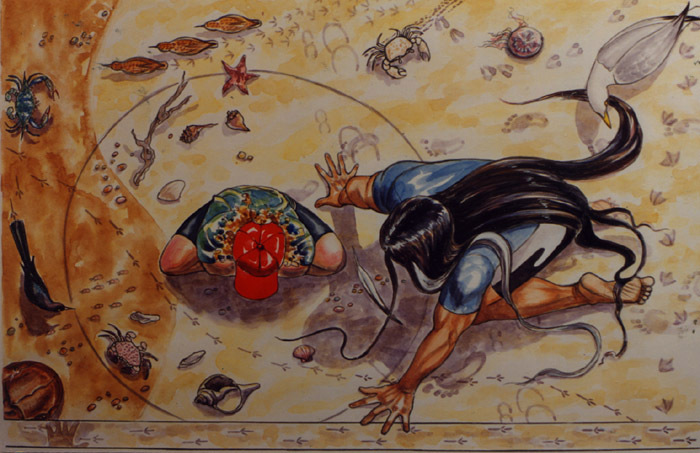 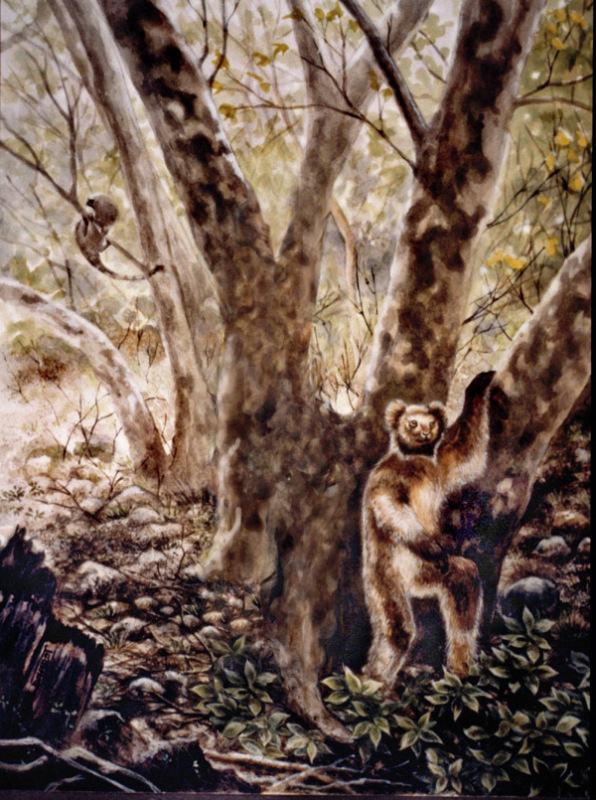 Some techniques: Wet into wet: make a puddle of the color you need. Wet your paper with a large brush. Brush wet paint into wet paper. It will blur and spread. If you tilt the paper, you can make a fairly smooth wash. Wet into dry: wet paint, dry paper; you get a harder edge. I often hold two brushes: one with paint, and one with just water. I use the wet brush to blur the edges of the painted stroke. Dry into wet: will tend to pick up paint. You can use a damp brush and (ack!) scrub it sideways slightly to pick up some paint. You can also dab with a paper towel. Salt: table, kosher, pretzel; try different sizes and textures. Dropped into wet paint, it will bloom as it melts. Depending on the color, how dark it is, and how wet it is, the salt will bloom more or less, creating snowflake patterns. Sponges: make cool textures. Spatter: toothbrushes, bristley brushes... cavemen used this technique (although they got a mouthful of paint and sprayed it onto the wall by making a huge raspberry: ppphhhhhttttthhhpt!) Rock textures, woods textures, foliage, grass... Dry brush: barely wet the bristles, minimum of paint on the brush. It should come off with a scratchy texture. Wood, hair, grass, tree bark... Japanese: check out the one stroke techniques of some of the Asian styles of watercolor. Beautiful in its simplicity and elegance, it's how you hold and move the brush... an economy of motion, elegant, like Tai Chi. Books abound on the subject. Draw, outline, color: draw it. Outline it in Prismacolor or ink (Sharpie will work). Color it simple. You can do this effectively even if you're a first grader. A lot of kids tend to draw vague grey pencil doodles; this watercolor/line technique takes a pretty good drawing that would have been vague grey and zaps it with line and color you can see from 50 feet away. |