Play with y0ur toys, eh, collectibles
a tiny tutorial on how to photograph your ponies, mermaids, dragons or Starfleet crew
No need to leave your collectibles in a box, or let them collect dust on a shelf. GO OUTSIDE AND PLAY!
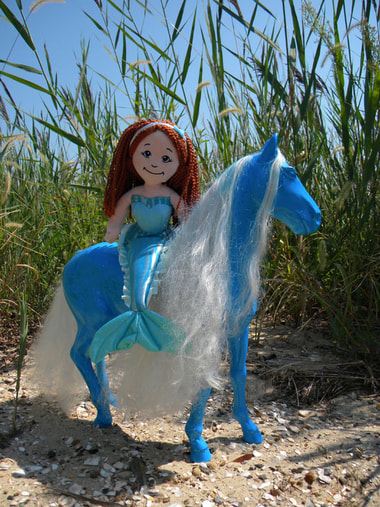
Shooting outdoor adventures with your models, whether they are Breyer horses, plush night furies, mermaids, or Starfleet crew is fun for everyone. I met one family whose kids were on a hike with the classroom mascot, a plush puppy, their job, to take a hike and photograph the puppy's adventure.
Photographing models in familiar places makes you look at that place from a new perspective... literally, often 6" from the ground. You will stop, observe more closely, appreciate tiny things you might have missed, because your character is 12" tall.
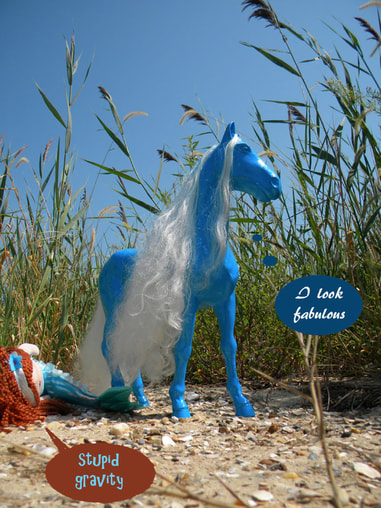
You can tell a story, create a meme, do silly captions, or just leave an intriguing photo for others to interpret.
Mix characters for some fun...
#advenaturedata on facebook, instagram and here
You can use a cell phone and post instantly to Instagram or Facebook... but the screen is hard to see in outdoor light, it's harder to hold the phone and focus and adjust the lighting. A real camera works better.
You can shoot live (cell phone shots are challenging but immediate) or use studio shots or green screen against live shots you did outside.
The 13th Doctor and Data are live, the others are green screen shots Photoshopped into Assateague Beach backgrounds from other years.
Photoshop allows you to composite photos, edit, and modify. A graphics tablet makes it easier. But there are many ways you have play with your toys if you just have a camera.
Below: a table diorama setup in the wild allows you to photograph tiny figures against real backdrops. Tabletop setup with sand, moss and sticks and rocks... Hanover Junction on the York County Rail Trail, in autumn. Breyer Stablemates horses, 1:32 scale, about 3" tall.
Shooting in the Wild
Green Screen and studio shoots
- When shooting in the wild, I often have dowel rods (to stick into the sand) and pipe cleaners (to tie characters to dowel rod so they don't fall over).
- Your "eye level" is the characters' eyes unless you've done an aerial shot or low angle shot. You normally shoot most photos from your own eye level. Make your characters feel life sized.
- Use your landscape and shoot UP from a low angle, it makes your characters look Epic.
- Beware the focus: make sure the camera is actually focusing on the character, the face, the hand, or whatever your focus is. Your focus needs more focus. Many digital cameras randomly focus on backgrounds and such. Smite them. You can hold a card (grey card, or even random printed piece of stiff paper) right against your character... press shutter halfway, camera focuses on card, withddraw card, shoot. Taaa daaah! Unless you forgot to withdraw the card.
- Beware lighting. Is your pale skinned android in bright sun while your dark skinned Klingon is in the shade? Which one are you setting the light setting for? Or maybe you want to move them both into open shade. Beware shafts of bright sun on any characters. That part burns out while the shadows get too dark. Play with your camera settings, adjust in Photoshop, or pick more even natural lighting. Also, fill flash or reflectors or additional lights are your friend.
- Shoot many different exposures. One will work. Bracket those shots.
- Where is your character looking? Not where YOU think, where your camera is seeing...
- What's in your background? Power lines? Your out of scale house? Shoot around it. I placed Data against a small cedar tree, but you could see out of scale civilization around it. I moved back, used the zoom, and now, just tree behind him. Move back, use the zoom, your character will look smaller against the tree/moon/whatever.
- Water has scale. Tiny waves look blurbly and jellolike. You can however, throw a cup of water at a 12" figure or horse and get a realistic splash. A 3" tall dragon, not so much.
- Practical FX: throw a cup of water, sand or snow at your character's feet to make it look like they are running... a spray bottle creates scale rain.
- Don't fear the mud... unless your character is unwashable. It's authentic. But do be aware of wind and tide... Toothless once washed out on a wave. Fortunately, he washed right back in on the next one.
- Tripods are your friend. You can now throw practical FX at your characters without moving the camera. You can also shoot a clean background, then one with the characters... in case you need to adjust the lighting or focus on either one.
- Focus: often a character shot closeup will be in focus while the background isn't... or the background is and the character isn't. Shoot both separately from the exact same angle (tripod). Combine in Photoshop.
- Tables are your friend. You can set up characters on a table outside, with a nice surface (sand, moss, rocks, twigs). This puts them at a realistic eye level to the background. Also easier on your back and knees.
- Mix and match characters, not only from different worlds, but you can use different materials: adult Toothless is plush, Data is a typical plastic action figure (with cloth clothing). Just be sure they are similar scales. You can put a smaller character in the background (they will appear to be far away) or foreground (perspective makes them look bigger).
- Your tiny scale characters are still fabulously photographable.
- Different characters in different scales (or, LOTR 101) The Voyager Doctor is a smaller scale than the other Trek characters. By placing him nearer the camera, he fits. Larger things in the far background will look small ... a smaller model closer to the camera now matches your larger model farther away. You can also place smaller scale characters in the background, they just look more distant.
- Different styles of characters: Moana is about the same scale as the Trek characters and the Who Doctor, but her head is larger due to the cartoon style. Having her right next to a more realistic character is less workable than having her either forward or back farther. Keeping her off to the side works, as long as she isn't right next to a realistic character.
- Cell phones are harder to hold while focusing, and getting the proper exposure. You also can't see the screens in bright light... or any outdoor light. Real cameras are easier. But you can instantly upload stuff from your phone. "Live shots" are challenging.
Green Screen and studio shoots
- a piece of wrinkle free fabric, plywood, masonite, foamcore, matboard in bright green
- Paint your dowel rods green to match the green screen.
- make sure the lighting on the green screen is even, any shadows or wrinkles will be different colors and be harder to remove in editing
- In the studio setup, the characters stood well in deep sand (about 2"). Or you can lean them against the green screen, but that often creates shadows and green reflections on the characters. Dowel rods stuck in cups of sand or doll stands or tiny tripods work too.
- On Photoshop, you deselect green, and move the rest onto a background photo (be sure the sizes/scales of the photos match).
- blend your foreground (here, studio sand) into your background photo. Clone stamp, blurring, smudging, and use of layer mask blend foreground and background.
- Use a brush set to color (it changes the color without painting over it) to eliminate leftover green around the edges.
- make sure your lighting on the characters matches the lighting in the background photo.
- be sure your perspective matches: your eye level should be the same in foreground studio setup and background photo: don't have a mouse eye view in the studio and a drone shot in the background.
- I often use a layer mask to remove any leftover green: black reveals the base layer/background photo, white returns it if you screw up.
- I use the blur tool to soften the edges, making the characters seem more a part of the background.
Above: Toothless at Eastern Neck Island MD. Toothless fits in the palm of your hand. He is one of my favorite models. I have three with different expressions, and movable heads.
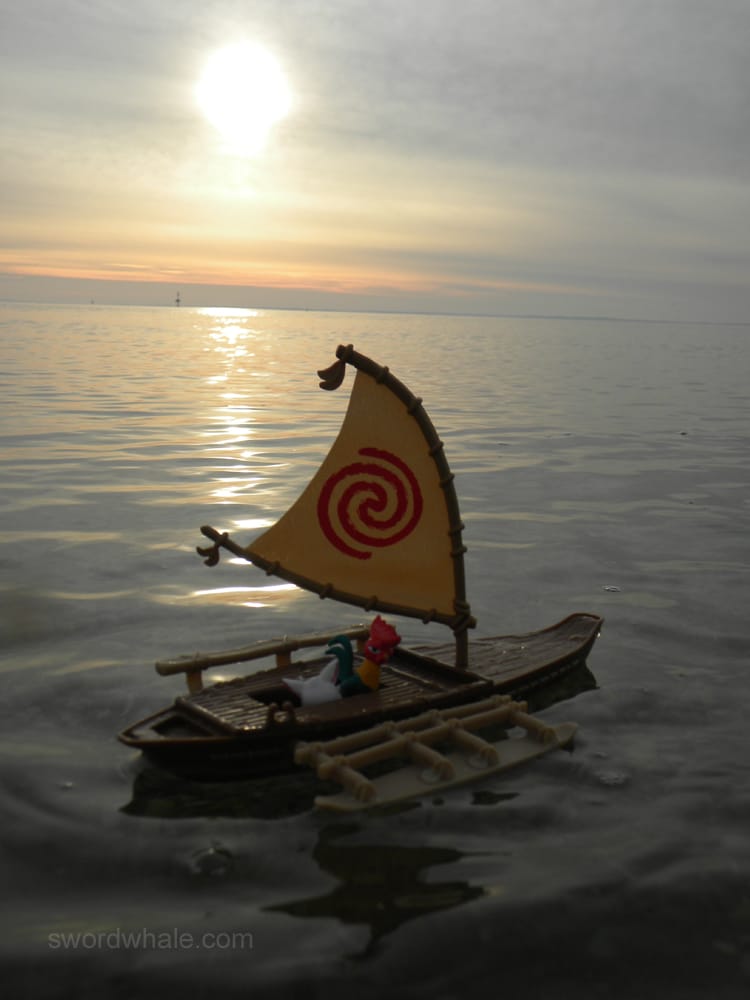
Below: this is a tiny model of Moana's boat from the Disney film. Yes it floats. Yes, it is floating in the Chesapeake Bay, specifically, off the beach at Rock Hall MD. There is nothing out there but water... down to the sea (to the left). Yes, I paid attention to which way the tide and wind were going...
Below: this is a tiny model of Moana's boat from the Disney film. Yes it floats. Yes, it is floating in the Chesapeake Bay, specifically, off the beach at Rock Hall MD. There is nothing out there but water... down to the sea (to the left). Yes, I paid attention to which way the tide and wind were going...


