Mural: painting
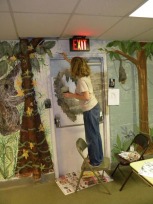
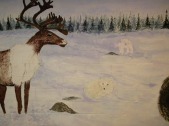
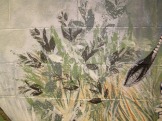
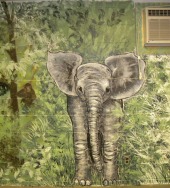
Our photos from the Manheim Township Recreational Dept mural class here show the steps in the painting process.
Any water-based paint (that dries insoluble) will work: house paint, artists' acrylics, craft paints, water-mixable oils. You can paint oil over latex or acrylic but not (as I remember) water-based paints over oil.
Techniques:
Wet into wet; paint color A...add some of color B while A is still wet, blend. Blend several colors at once. Be careful not to get too many colors going...that = mud. You can use two brushes: one full of paint, one wet with water to blend the colors. You can also use a dry brush to blend colors.
Wet into dry: let the layer below dry before adding more color. Hair dryers are my friend. Layers can be opaque, translucent, or transparent. Use acrylics for transparent or translucent colors, house paints are made with a lot of opaque white, so they thin rather chalky. You can thin with water, or with one of the clear mediums found at art supply stores (they are usually thicker and more gel-like).
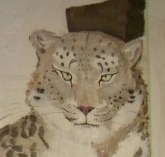
Drybrush: this means a DRY brush. Just enough paint on the bristles to fall off onto the wall. It doesn't flow, as in a wet brush. It scratches, bristles, makes cool textures. A scratchy, bristly, even chewed up brush works great for this technique. Fur, treebark...
Get wierd: try the dog-fur-mat cutter (like a big bent fork) one of our artists used to scratch paint off the wall, creating hair textures. Or use a bent fork, a garden tool, tree bark, anything that creates texture. You can also attach, glue, screw, nail stuff to the wall as part of your mural. That's called collage, or bas relief.
Opaque: like wall paint, you can't see through it. Most house paints are designed to be very opaque, so they cover the color (or lack of it) underneath. This quality makes them quite (yuck!) chalky when you thin them down.
Translucent: you can see through it, sort of. Like sea glass. Like shower curtains. Some craft paints and oils, and acrylics are good.
Transparent: like stained glass. Diet soda. Grape juice. Jellyfish. This is the Way of Watercolor. Which doesn't work on walls. However, some acrylics thin down nicely (there are mediums at art supply stores, sort of jellyish, to thin them without maing them runny). You can use transparent techniques to lay a glaze of color over part of your painting, or for background effects, to add layers of depth of color to a figure.
Plant slapping: cut a small branch with a few leaves on it, use a paint tray (for a paint roller), roll out a thin layer of paint, slap the leaves on it (coat them with paint), slap on wall: with some practice (on cardboard or newspaper) you should get a neat plant print. You can also sponge or roll paint onto leaves and press onto the wall. You'll use a lot of newspaper to press leaf prints onto the wall: you need a clean surface behind your leaves each time. You can use spray paint (ventilation!) in several colors; the leaves will "leave" a shadow as you spray them. Alternating lighter and darker colors as you move your leaves across the wall will create a wonderful sense of foresty depth.
Spongebob: use natural sponges, or shred a square yellow one. Experiment with textures: dab, splat, stroke, streak, toss, use wetter, dryer. Wrap something (wire, twigs, rope, tape) around part of a paint roller to create a texture.
Use interruptions in your wall to your advantage. We couldn't get rid of the pipe below (seems to be an important part of the plumbing or something), so we turned it into a tree. Wrap something around a window, grow vines over the windowsill, turn a door into a cave entrance, perch an owl on the air conditioner..
